Scrappy Piping /ˈskra-pē/ /pahy-ping/ , noun
1. Short pieces of a variety of fabric prints and colors sewn together into one long strip then wrapped and sewn around cording.
And now that I am quilting I need to make continuous strip bindings (which I have also done "scrappy style").
However, this one sewing skill has left me frustrated pretty much every time. My problem was I could never attach them so they are perfectly lined up without a lot of attempts. They are usually off by at least 1/8th of an inch which ends up being on both sides And for both quilt binding and piping you really need nice even sides (or at least I do) which means I have done a lot of unsewing! I had googled for tutorials but never came up with the one that fixed my problem. So when my wonderful quilting instructor showed me this trick I was more than thrilled!! Now I want to share it here so if someone has been incessantly searching for the way to "perfect" continuous binding they can conclude their search here.
Perfect Continuous Fabric Strip for Binding and Piping
1. Cut your strips to however wide you need them. It will depend on your piping size or your quilt binding needs. Mine were 2" wide.
2. On your mat find the area that is a half inched square with 45 degree lines.
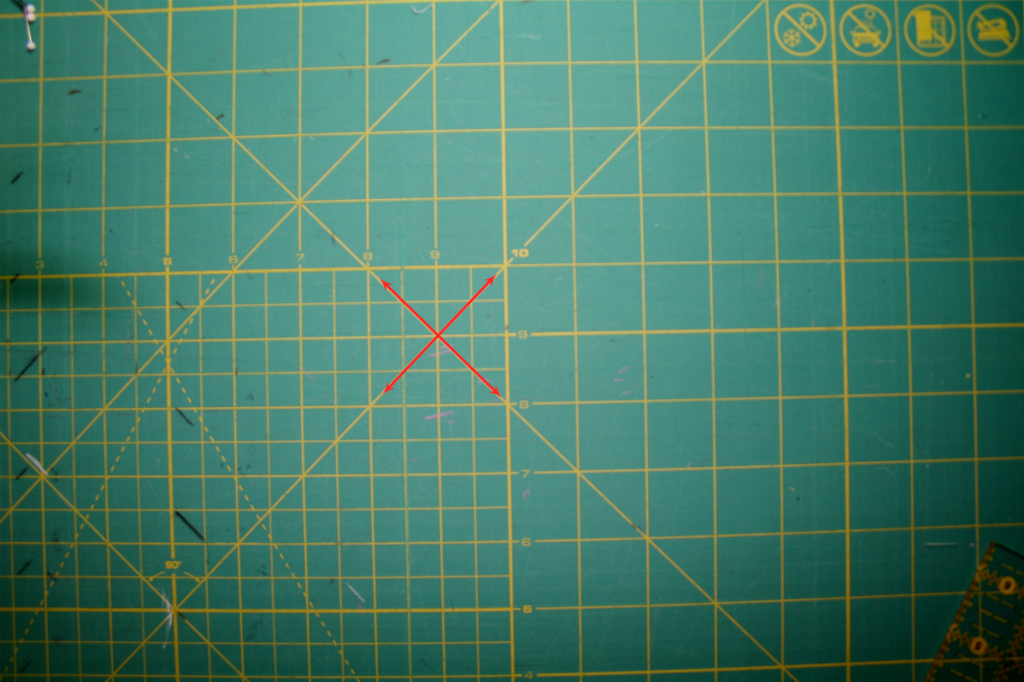
We are going to be using the area where the two opposite 45 degree lines intersect. The red arrows are marking the spot.
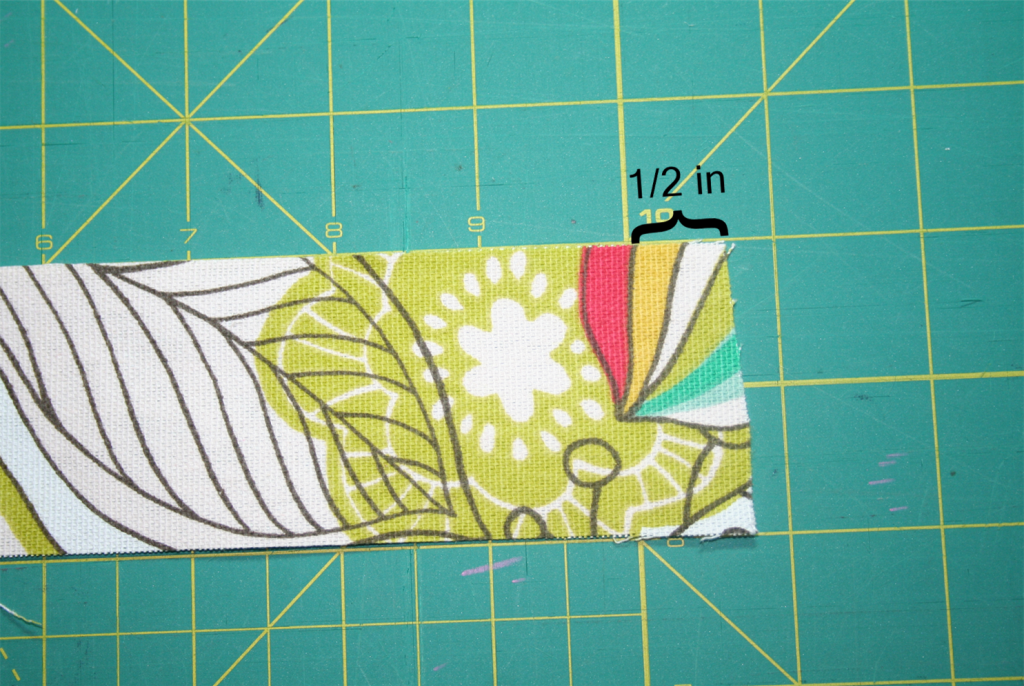
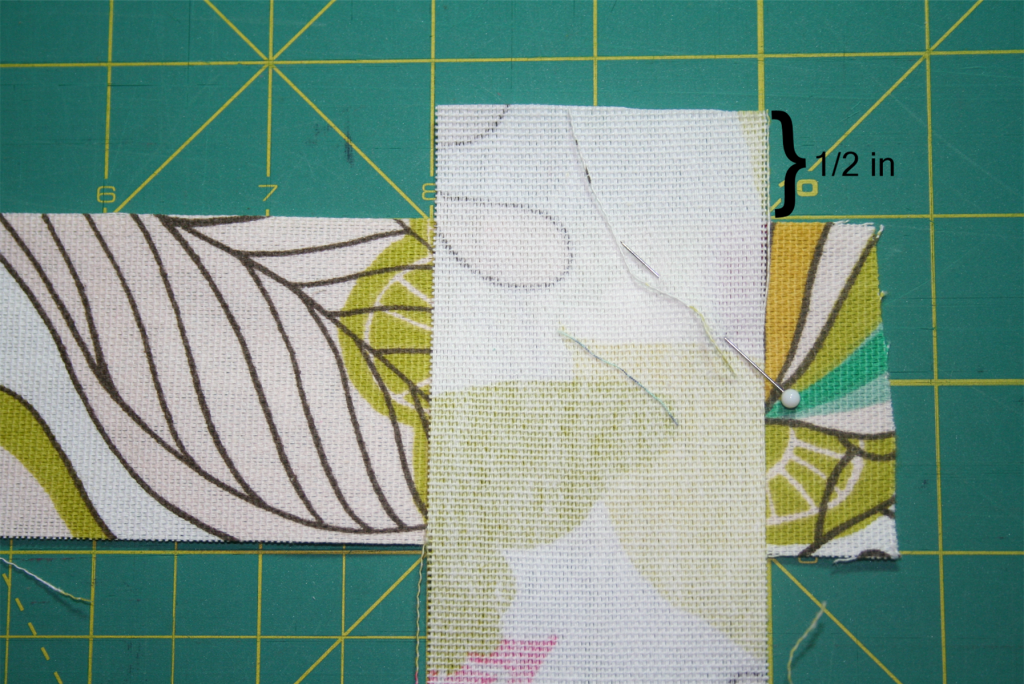
3. One very important tip....do this while standing up and looking directly over your mat. Like airplane view? Sky view? Well... I'm sure you know what I mean. Now lay your first strip right side up lined up horizontally along the top line of that angled square. Leaving approximately a 1/2 inch overlap.
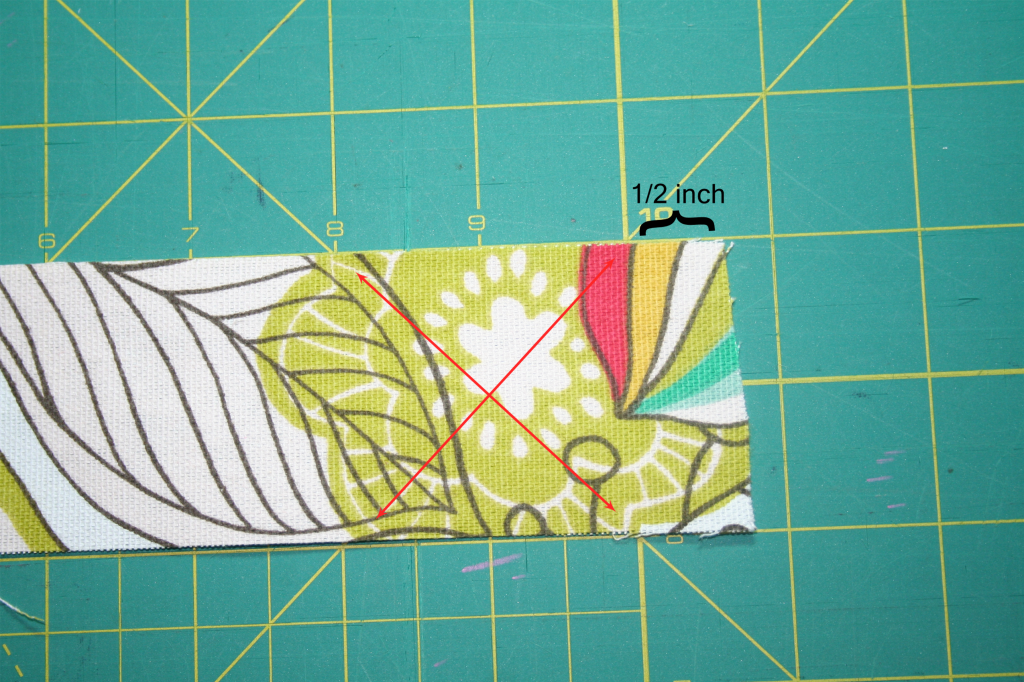
4. The second strip will be wrong side up and lined up against the vertical line leaving approximately a 1/2 inch overlap. Pin the top right corner making sure to leave enough space for your sewing foot to get through.
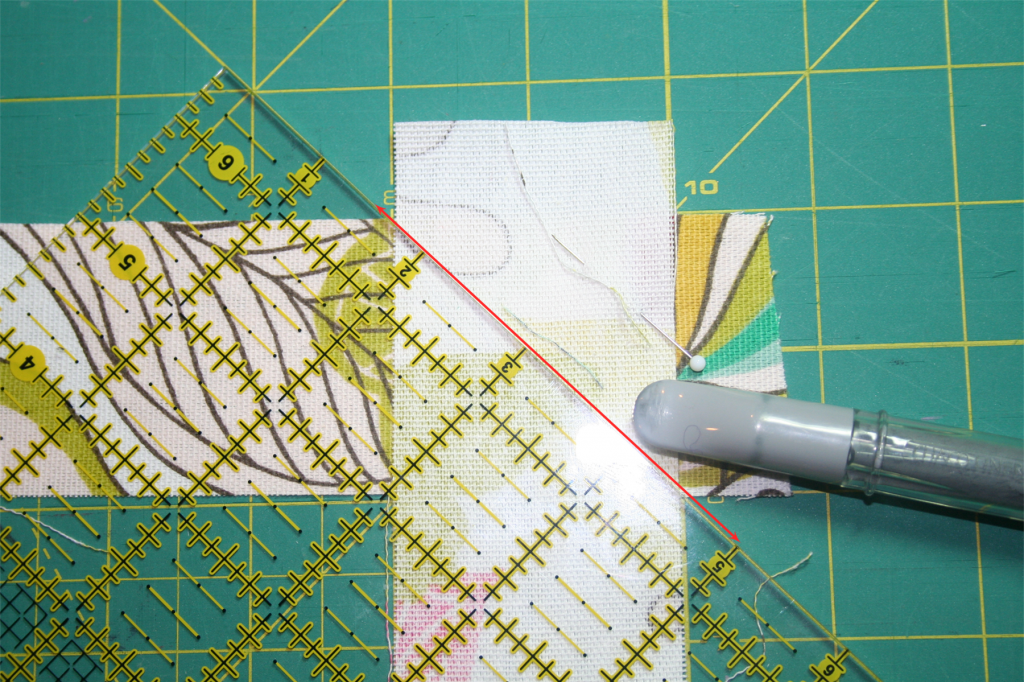
5. Take a ruler (I recommend a smaller one as it is easier to handle) and line it up on the 45 degree angle. Make sure the ruler is lined up perfectly with the angled line and the corners that are formed from the half inch overlaps. Use a marking pen and draw a line.
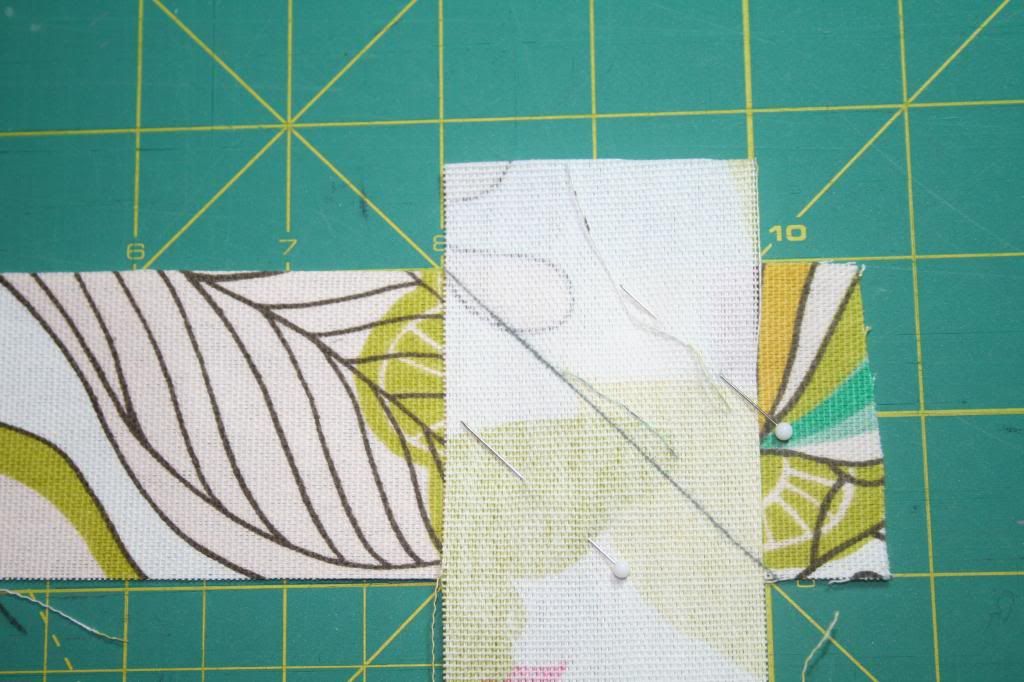
6. Remove the ruler and pin the lower left side. Again, make sure you leave enough space between pins to get your sewing foot through as you do not want to and shouldn't have to remove pins.
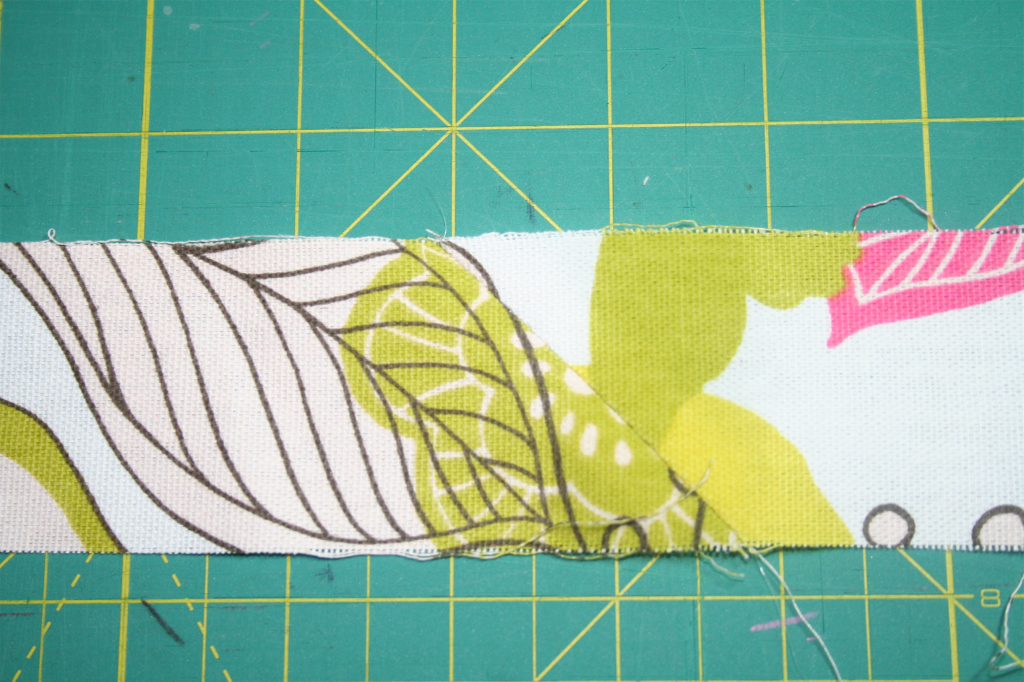
7. Now take it to your machine and sew!! You could do as many strips as you needed before taking it to the machine. Just make sure you don't get the right sides and wrongs sides mixed up! Once you have sewed, trim the seam to a 1/4 inch and trim the triangles off the sides. Press seam open!! This is important for perfect line up and also for no bulk in your seams.
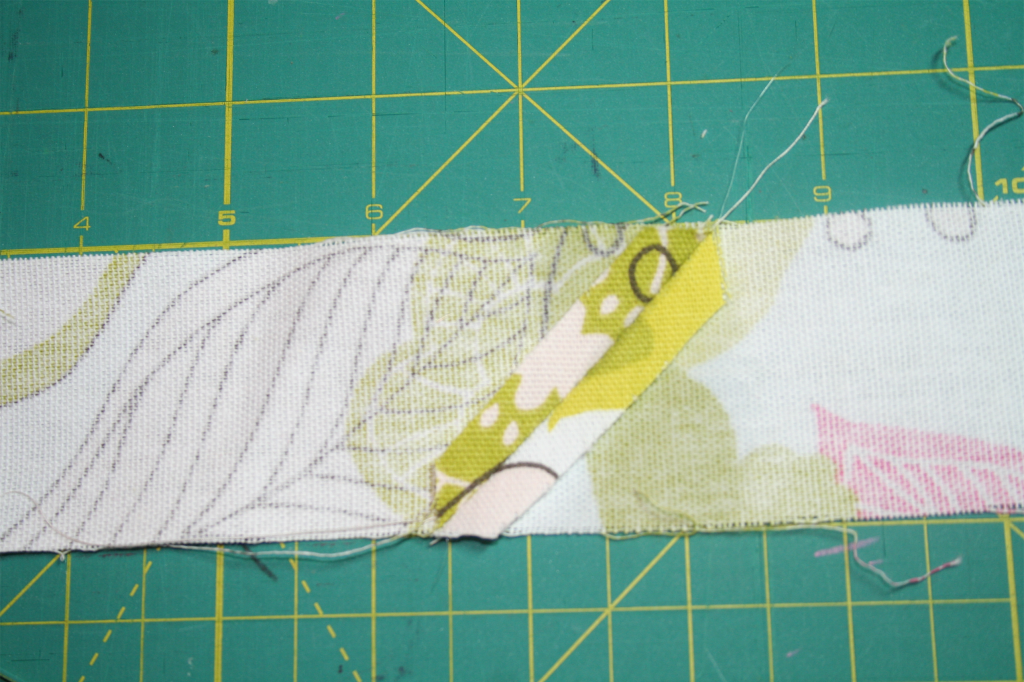
8. Wa-la! Perfect! Eeeee! I am one of those people that get just a little too excited when something is perfect. Hopefully those of you like me, who like a little perfection now and then, will get as excited as I do over this! Hope it helps!!
Toodles!!